To celebrate the launch of our Cardano Stake Pool [NASEC1] created in the name of increasing decentralisation we would like to bring to the community a more wordy stake pool guide. We will try to explain exactly what is happening in each step so that any one can help the efforts of decentralisation. All delegated stake is greatly appreciated and we hope to become an active part of the Cardano community.
So first thing’s first, we will follow along with the Official Documentation guide that we used available on the Cardano site.
This guide is full of all the information to build your node but it is not well organised, had a few typos at the time of us building our node and leaves out some vital information so you will want to refer back here at each step.
Prerequisites
Taken directly from the official docs page:
- operational knowledge of how to set up, run and maintain a Cardano node continuously
- a commitment to maintain your node 24/7/365
- system operation skills
- server administration skills (operational and maintenance).
- experience of development and operations (DevOps) would be very useful
We are going to need to add a few things here.
Firstly it should be noted that you will need at least 3 Ada to create their pool but you will likely want more Ada than this.
Second you will need an absolute minimum of 2 if not 3 servers whether they are VPS or dedicated machines meeting the minimum specifications. We need 2 servers as the one will be our Relay and the second our Producer, both will run Ubuntu 20.04 LTS.
Minimum Hardware Specifications
2 x Servers (VMs or physical hosts) with the following minimum specs:
- 4 GB of RAM
- 2 CPU cores
- 10 GB Disk space
- A public IP address
However it should be observed that the producer node only communicates with your own relays and as such this can operate on a private network so long as all of your relays have network connectivity to it. Your producer node does not communicate directly with the wider network and as a security measure we recommend hosting it on a private network.
Installation of Cardano Relay
Also please be extra careful with your .skeys as those are your private keys and they have to remain private. Furthermore, your cold keys should never be stored on your production servers. I know it’s painful to transfer files using a USB stick but that’s how it should be done.
We need the following packages and tools on top of our Ubuntu server to download the source code and build it:
- The version control system git,
- The gcc C-compiler,
- C++ support for gcc,
- Developer libraries for the arbitrary precision library gmp,
- Developer libraries for the compression library zlib,
- Developer libraries for systemd,
- Developer libraries for ncurses,
- ncurses compatibility libraries,
- The Haskell build tool cabal,
- The GHC Haskell compiler.
Update our repositories:
sudo apt-get update -y
sudo apt-get install automake build-essential pkg-config libffi-dev libgmp-dev libssl-dev libtinfo-dev libsystemd-dev zlib1g-dev make g++ tmux git jq wget libncursesw5 libtool autoconf -y
We’ll also need the latest Cabal, to download as follows.
wget https://downloads.haskell.org/~cabal/cabal-install-3.2.0.0/cabal-install-3.2.0.0-x86_64-unknown-linux.tar.xz
tar -xf cabal-install-3.2.0.0-x86_64-unknown-linux.tar.xz
rm cabal-install-3.2.0.0-x86_64-unknown-linux.tar.xz cabal.sig
mkdir -p ~/.local/bin
mv cabal ~/.local/bin/
Verify that .local/bin is in your PATH
echo $PATH
If .local/bin is not in the PATH, you need to amend the following line to your .bashrc file
vi ~/.bashrc
if ! shopt -oq posix; then
  if [ -f /usr/share/bash-completion/bash_completion ]; then
    . /usr/share/bash-completion/bash_completion
  elif [ -f /etc/bash_completion ]; then
    . /etc/bash_completion
  fi
fi
export PATH="~/.local/bin:$PATH"
Save the file and source it using
source .bashrcUpdate Cabal
cabal updateConfirm you are running the latest cabal
cabal --version
Download GHC, untar the file and then remove the left over tar bundle.
wget https://downloads.haskell.org/~ghc/8.6.5/ghc-8.6.5-x86_64-deb9-linux.tar.xz
tar -xf ghc-8.6.5-x86_64-deb9-linux.tar.xz
rm ghc-8.6.5-x86_64-deb9-linux.tar.xz
Install GHC
 ./configure
sudo make install
Check the GHC version
ghc --version
Install Libsodium
cd ~
git clone https://github.com/input-output-hk/libsodium
cd libsodium
git checkout 66f017f1
./autogen.sh
./configure
make
sudo make install
Amend the following to your .bashrc file and source it.
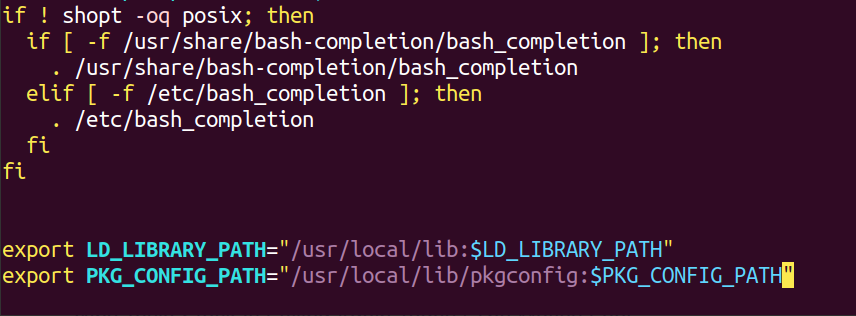
export LD_LIBRARY_PATH="/usr/local/lib:$LD_LIBRARY_PATH"
export PKG_CONFIG_PATH="/usr/local/lib/pkgconfig:$PKG_CONFIG_PATH"
Source the file so that these system variables are read.
source .bashrcDownload the source code for cardano-node
git clone https://github.com/input-output-hk/cardano-node.git
cd cardano-node
git fetch --all --tags
git tag
At the time of writing the latest is 1.19.1, if there is a newer version please use it.
git checkout tags/1.19.1Build and Install the Node with Cabal
cabal build allCopy the executables files to the .local/bin directory.
cp -p dist-newstyle/build/x86_64-linux/ghc-8.6.5/cardano-node-1.19.1/x/cardano-node/build/cardano-node/cardano-node ~/.local/bin/
cp -p dist-newstyle/build/x86_64-linux/ghc-8.6.5/cardano-cli-1.19.1/x/cardano-cli/build/cardano-cli/cardano-cli ~/.local/bin/
Check the version installed.
cardano-cli --version
So now we have created a Cardano node.
Note: To update your Cardano node to a newer version, the same process must be repeated as above with a different tag selected.
For the node to connect to the network we need 3 configuration files, download them from the terminal.
wget https://hydra.iohk.io/job/Cardano/cardano-node/cardano-deployment/latest-finished/download/1/mainnet-config.json
wget https://hydra.iohk.io/job/Cardano/cardano-node/cardano-deployment/latest-finished/download/1/mainnet-byron-genesis.json
wget https://hydra.iohk.io/job/Cardano/cardano-node/cardano-deployment/latest-finished/download/1/mainnet-shelley-genesis.json
wget https://hydra.iohk.io/job/Cardano/cardano-node/cardano-deployment/latest-finished/download/1/mainnet-topology.json
Up to this point on the guide, the setup/steps are the same both for the relay node(s) and the producer as we basically have installed the binaries that allow us to run the Cardano protocol. If it’s easier for you, you can clone the node created above and continue with the configuration.
Configure the Cardano Relay Node
The file describing the topology: mainnet-topology.json
This file should be configured as follows, be careful this must follow exact JSON syntax. Do not use tabs only spaces.
{
  "Producers": [
    {
      "addr": "relays-new.cardano-mainnet.iohk.io",
      "port": 3001,
      "valency": 2
    },
    {
      "addr": "<Producer's external IP>",
      "port": 3002,
      "valency": 1
    }
  ]
}
Just change the <Producer’s external IP> to your Producer’s real IP.
The configuration file: mainnet-config.json
There is nothing to change here, if you want to use a separate dedicated monitoring server, change the EKG running port from the localhost (127.0.0.1) to 0.0.0.0 to be able to fetch the data.
"hasEKG": 12788,
  "hasPrometheus": [
    "127.0.0.1",
    12798
!!!! We have to be really careful though as if we don’t configure our firewall properly anyone will be able to get the EKG data from our server!!!
And those are all the changes we have to make.
To start the node use
cardano-node run --topology mainnet-topology.json --database-path db/ --socket-path node.socket --host-addr <The external IP of the node> --port 3000 --config mainnet-config.jsonTIP: You can use some of the scripts to make your life easier using tmux.
Check that the node is syncing by fetching the current tip. When syncing slotNo should be increasing.
cardano-cli shelley query tip --mainnet
Cool, now let it run, it will take some time for the database to sync up, be patient!
Configure the Producer Node
This is an exact replica of the steps above however we are changing the mainnet-topology.json file:
{
  "Producers": [
    {
      "addr": "<Relay_IP>",
      "port": 3000,
      "valency": 1
    }
  ]
}
If you have multiple relays add them all.
Security Warning: Please make sure the Producer can be accessed only by your own Relays
Also if your monitoring server is on a separate server make the same change as in the Relay node above in the mainnet-config.json file.
Creating Keys and Addresses
In the Shelley era of Cardano, every stakeholder can have two sets of keys and addresses:
- Payment Keys and Addresses: To send and receive transactions
- Stake Keys and Addresses: To control protocol participation, create a stake pool, delegate and receive rewards.
cardano-cli shelley address key-gen \
--verification-key-file payment.vkey \
--signing-key-file payment.skey
And you should now have 2 keys, payment.vkey and payment.skey
payment.vkey is the public key
payment.skey is the private key
Stake key pair, these can be generated using:
cardano-cli shelley stake-address key-gen \
--verification-key-file stake.vkey \
--signing-key-file stake.skey
Payment Address
We’ll use as input the payment.vkey and stake.vkey produced above:
cardano-cli shelley address build \
--payment-verification-key-file payment.vkey \
--stake-verification-key-file stake.vkey \
--out-file payment.addr \
--mainnet
Stake address
This address will not receive any payments, only the pool rewards.
We’ll use as input the stake.vkey from above:
cardano-cli shelley stake-address build \
–stake-verification-key-file stake.vkey \
–out-file stake.addr \
–mainnet
Generating keys for our block-producing node
Generate the KES Key pair
cardano-cli shelley node key-gen-KES \
--verification-key-file kes.vkey \
--signing-key-file kes.skey
Generate VRF Key pair
cardano-cli shelley node key-gen-VRF \
--verification-key-file vrf.vkey \
--signing-key-file vrf.skey
In an offline machine and only offline!!! Create the cold keys.
To be able to do that, copy the cardano-cli binaries from one of you nodes to this offline machine using a usb stick . the file is ~/.local/bin/cardano-cli
mkdir pool-keys
cd pool-keys
cardano-cli shelley node key-gen \
--cold-verification-key-file cold.vkey \
--cold-signing-key-file cold.skey \
--operational-certificate-issue-counter-file cold.counter
Make sure to back up all your keys to another secure storage device. Make multiple copies.
So now we have all the keys required to create an operational certificate to verify the pool has the authority to run, but before doing that, we have to know the kesPeriod by dividing the slot tip number by the slotsPerKESPeriod and this is done on our Producer node.
The current tip of the blockchain is:
cardano-cli shelley query tip --mainnet
Look for slotNo which in our case is 7909745.
grep KESPeriod mainnet-shelley-genesis.json

And the slotsPerKESPeriod which is 129600
So the kes-period is 61

Now we can go back to our offline machine and generate the certificate:
cardano-cli shelley node issue-op-cert \
--kes-verification-key-file kes.vkey \
--cold-signing-key-file cold.skey \
--operational-certificate-issue-counter cold.counter \
--kes-period 59 \
--out-file node.cert
Next, copy the node.cert file to your producer node and make sure the following files are present:
kes.skey kes.vkey node.cert vrf.skey vrf.vkey
Register Stake Address on the Blockchain
On your Producer node:
Create your stake certificate using stake.vkey from above:
cardano-cli shelley stake-address registration-certificate \
--stake-verification-key-file stake.vkey \
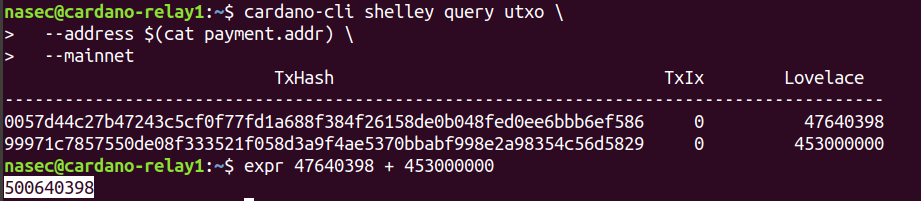
--out-file stake.certFind your balance and UTXOs.
cardano-cli shelley query utxo \
  --address $(cat payment.addr) \
  --mainnet
Keep in mind that this is the total Lovelace in your payment.addr, this means that in our case as we sent the funds in two transactions the total would be 500640398.
Get protocol parameters
cardano-cli shelley query protocol-parameters \
  --mainnet \
  --out-file protocol.json
Draft the transaction
cardano-cli shelley transaction build-raw \
--tx-in 4e3a6e7fdcb0d0efa17bf79c13aed2b4cb9baf37fb1aa2e39553d5bd720c5c99#4 \
--tx-out $(cat payment.addr)+0 \
--ttl 0 \
--fee 0 \
--out-file tx.draft
Calculate the fee
cardano-cli shelley transaction calculate-min-fee \
--tx-body-file tx.draft \
--tx-in-count 1 \
--tx-out-count 2 \
--witness-count 1 \
--byron-witness-count 0 \
--mainnet \
--protocol-params-file protocol.json
You have to make sure your balance is greater than cost of fee + keyDeposit.
At the moment the pool does not have any Ada, you will use the payment.addr to send some Ada to.
The keyDeposit is 2000000 lovelace:
grep keyDeposit protocol.json

Calculate the change to send back to the payment address:
expr <UTXO BALANCE> – <AMOUNT TO SEND> – <TRANSACTION FEE>
In our case:
expr 500640398 – 2000000 – 167965
Determine the TTL of the transaction
cardano-cli shelley query tip --mainnetFind the tip from the command above and add 1000 slots to make sure the TTL is not to short:

7913908 + 1000 = 7914908

Build the transaction
cardano-cli shelley transaction build-raw \
--tx-in 4e3a6e7fdcb0d0efa17bf79c13aed2b4cb9baf37fb1aa2e39553d5bd720c5c99#4 \
--tx-out $(cat payment2.addr)+10000000 \
--tx-out $(cat payment.addr)+9832035 \
--ttl 7914908 \
--fee 167965 \
--out-file tx.raw
Security Warning: After you copy the tx.raw file to your offline machine
Sign the transaction
cardano-cli shelley transaction sign \
--tx-body-file tx.raw \
--signing-key-file payment.skey \
--mainnet \
--out-file tx.signed
Copy back your tx.signed to your Producer
Submit the transaction
cardano-cli shelley transaction submit \
--tx-file tx.signed \
--mainnet
Register your Stake Pool
Create a JSON file with your pool’s metadata and name it poolMetadata.json:
Eg.
{
 "name": "NASec1",
 "description": "London based data centre hosted dedicated server with RAID1 NVMe disks",
 "ticker": "NASEC",
 "homepage": "https://nasec.co.uk/cardano"
}
Get the hash of the file:
cardano-cli shelley stake-pool metadata-hash --pool-metadata-file poolMetadata.json
And now we can generate the pool registration certificate:
Back to our offline machine: run the command below using the files for input from above:
cardano-cli shelley stake-pool registration-certificate \
--cold-verification-key-file cold.vkey \
--vrf-verification-key-file vrf.vkey \
--pool-pledge <AMOUNT TO PLEDGE IN LOVELACE> \
--pool-cost <POOL COST PER EPOCH IN LOVELACE> \
--pool-margin <POOL COST PER EPOCH IN PERCENTAGE> \
--pool-reward-account-verification-key-file stake.vkey \
--pool-owner-stake-verification-key-file stake.vkey \
--mainnet \
--pool-relay-ipv4 <RELAY NODE PUBLIC IP> \
--pool-relay-port <RELAY NODE PORT> \
--metadata-url https://git.io/JJWdJ \
--metadata-hash <POOL METADATA HASH> \
--out-file pool-registration.cert
We Also need the delegation certificate pledge:
cardano-cli shelley stake-address delegation-certificate \
    --stake-verification-key-file stake.vkey \
    --cold-verification-key-file $HOME/cold-keys/node.vkey \
    --out-file deleg.cert
Then copy pool-registration.cert and deleg.cert to your Producer node
Submit the pool certificate and delegation certificate to the blockchain
To submit the pool registration certificate and the delegation certificates to the blockchain by including them in one transaction at least, like above, draft the transaction first and then build, sign and submit it to the blockchain.
Draft the transaction
cardano-cli shelley transaction build-raw \
--tx-in <UTXO>#<TxIx> \
--tx-out $(cat payment.addr)+0 \
--ttl 0 \
--fee 0 \
--out-file tx.draft \
--certificate-file pool-registration.cert \
--certificate-file delegation.cert
Calculate the fees:
cardano-cli shelley transaction calculate-min-fee \
--tx-body-file tx.raw \
--tx-in-count 1 \
--tx-out-count 1 \
--mainnet \
--witness-count 1 \
--byron-witness-count 0 \
--protocol-params-file protocol.json
Registering a stake pool requires a deposit. This amount is specified in protocol.json, for the mainet this is set to 500000000 in Lovelace.
Calculate the change after the transaction:
expr <UTxO BALANCE> - 500000000 - <Fees>Build the transaction:
cardano-cli shelley transaction build-raw \
--tx-in <UTXO>#<TxIx> \
--tx-out $(cat payment.addr)+<CHANGE IN LOVELACE> \
--ttl <TTL> \
--fee <FEE> \
--out-file tx.raw \
--certificate-file pool-registration.cert \
--certificate-file delegation.cert
Sign the transaction
cardano-cli shelley transaction sign \
--tx-body-file tx.raw \
--signing-key-file payment.skey \
--signing-key-file stake.skey \
--signing-key-file cold.skey \
--mainnet \
--out-file tx.signed
And finally submit it to the blockchain
cardano-cli shelley transaction submit \
--tx-file tx.signed \
--mainnet
To make sure your stake pool is now registered, go back to your offline machine to get the stakepoolid.txt
cardano-cli shelley stake-pool id --verification-key-file $HOME/cold-keys/node.vkey > stakepoolid.txtCopy it to your producer node and run:
cardano-cli shelley query ledger-state --mainnet | grep publicKey | grep $(cat stakepoolid.txt)If you get a non-empty string, well done, your pool is registered to the Cardano mainnet!!!
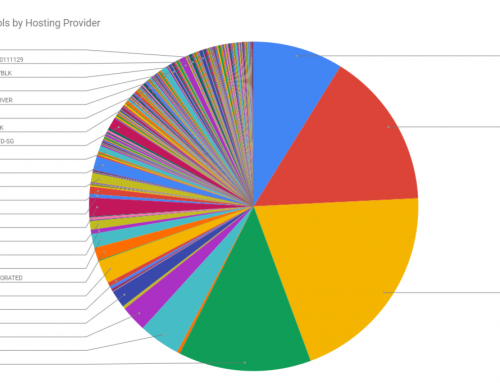
Now you have a Cardano Stake Pool configured that consists of a Relay and a Producer node and is registered to the Mainnet. You should be able to see your pool under Stake Pools in Daedalus and in https://pooltool.io/ as well.
Please let us know if you spot any typos/errors in the comments below.
Also we would like to invite you to delegrate your stake to NASEC1 and help the decentralisation of the blockchain.
Happy staking!